Happy Sunday to you all, it is gorgeous here, and I have some gorgeous swatches to share with you today. Per usual, I have chosen one polish from each shade in the rainbow to share with you today and I'll let you know what I thought of their formula and appearance and then where you can find them at the end of the post. Hope you find something you like :) Let's get started.
Peppermint Pedi
To start out this weekend, I have a color from
Sation's new spring line of polishes called Candylandia. I had really high hopes for this line because all the colors looked so happy and ready to call my collection home ;) I do have to admit however that when I started swatching them- many of them proved to be jelly polishes and took 3-4 coats to build up to opacity, and for that reason I wasn't totally in love with this collection. However the colors they came up with are fun, funky and very lovely. To start this is
Peppermint Pedi which was one of the creams. It is strawberry red and this is two coats. This is an
A polish.
Poppy
Here we have
Poppy from
Revlon. This might be one of the colors they were discontinuing because it's another I picked up on a 75% clearance, but maybe it was just CVS clearing things out, so if you love it you might want to look around. Personally I did love it. Some people don't like frost polishes because they can leave streaking lines on your nails, but I really love how they can change up your manicure- giving an alternative finish to your basic creams and jellies. Also I thought this color was divine and the finish was smooth. Pleased=
A
Club Havana
Wet n Wild Megalast Club Havana is a creamy tangerine. I don't think I've yet to pick up a polish from this line that wasn't a keeper. They are super cheap and super creamy and easy to apply. The bottles have a nice wide brush to cover your nail in almost one fell swoop. I recommend this line to anyone who wants to try some fun colors for yourself or your girls and doesn't want to invest too much in the venture :)
A
Abbra Cadazzle
Another
Sation for you this week. This is
Abbra Cadazzle. It is layered over white- as you can see on the pinky where I had a horrible nick on my way to photographing this swatch... Layering over white will make your colors pop more and it was surely the case for this sunflower yellow jelly. On it's own, I was a bit disenchanted with this polish. Some yellows can get nice and creamy and opaque- but I think this might be four coats to get it just this smoothed and evened out. Bit of a bummer. I do love the color, but because of it's formula, it just makes it less versatile for me for nail art. So for that reason I think it deserves a
B- and if you're going to order some polishes from Sation I'd probably skip this one. There are other yellow polishes out there that you'll be happier with.
Electric Slide
Now this I loved. First of all I didn't have anything like it on my polish racks. This is
Nina Ultra Pro Electric Slide layered over Sally Hansen Complete Salon Manicure in Grass Slipper. I think my layering choice gave the neon jelly with holo glitter the slightly dusty green appearance under the glitter coat. If I had chosen a brighter green I think it would have been truer to what Electric Slide is about, but even still I loved the combo. This was fun and fresh and I recommend this fun jelly glitter topper.
A.
Celestial
Hello
Pure Ice Celestial. As I've said before- Pure Ice is another winning brand for it's easy availability in a million shades and a price that everyone can afford. Just look at the divinity that is this color! A bright blue frost in two smooth coats. Love it!
A
Tantalize Me
I really didn't know how this one was going to turn out from looking at the bottle, or after one coat. However, after two thick, or three thin coats of
China Glaze Tantalize Me, I was in love. This yummy, frosty opalescent light purple may not be the best color for my skin tone, but I sorta don't care. When I looked down at it, it made me smile and that's really what I gauge it off of.
A
Baker
The last of the trio of polishes I picked up from
Cult Nails. I've seen this polish featured on some blogs and so I knew I had to include it in my order when I finally placed one. Honestly this brand applies like butter, which probably accounts for it's price tag- and you have to order it online, so it's not super readily available which are two downsides, but the quality of the formula and the complexity of these shades are some of the best out there. You'll notice
Baker is a nude polish with subtle gold shimmer. I'm showing it here at three coats. I love it and so will you!
A
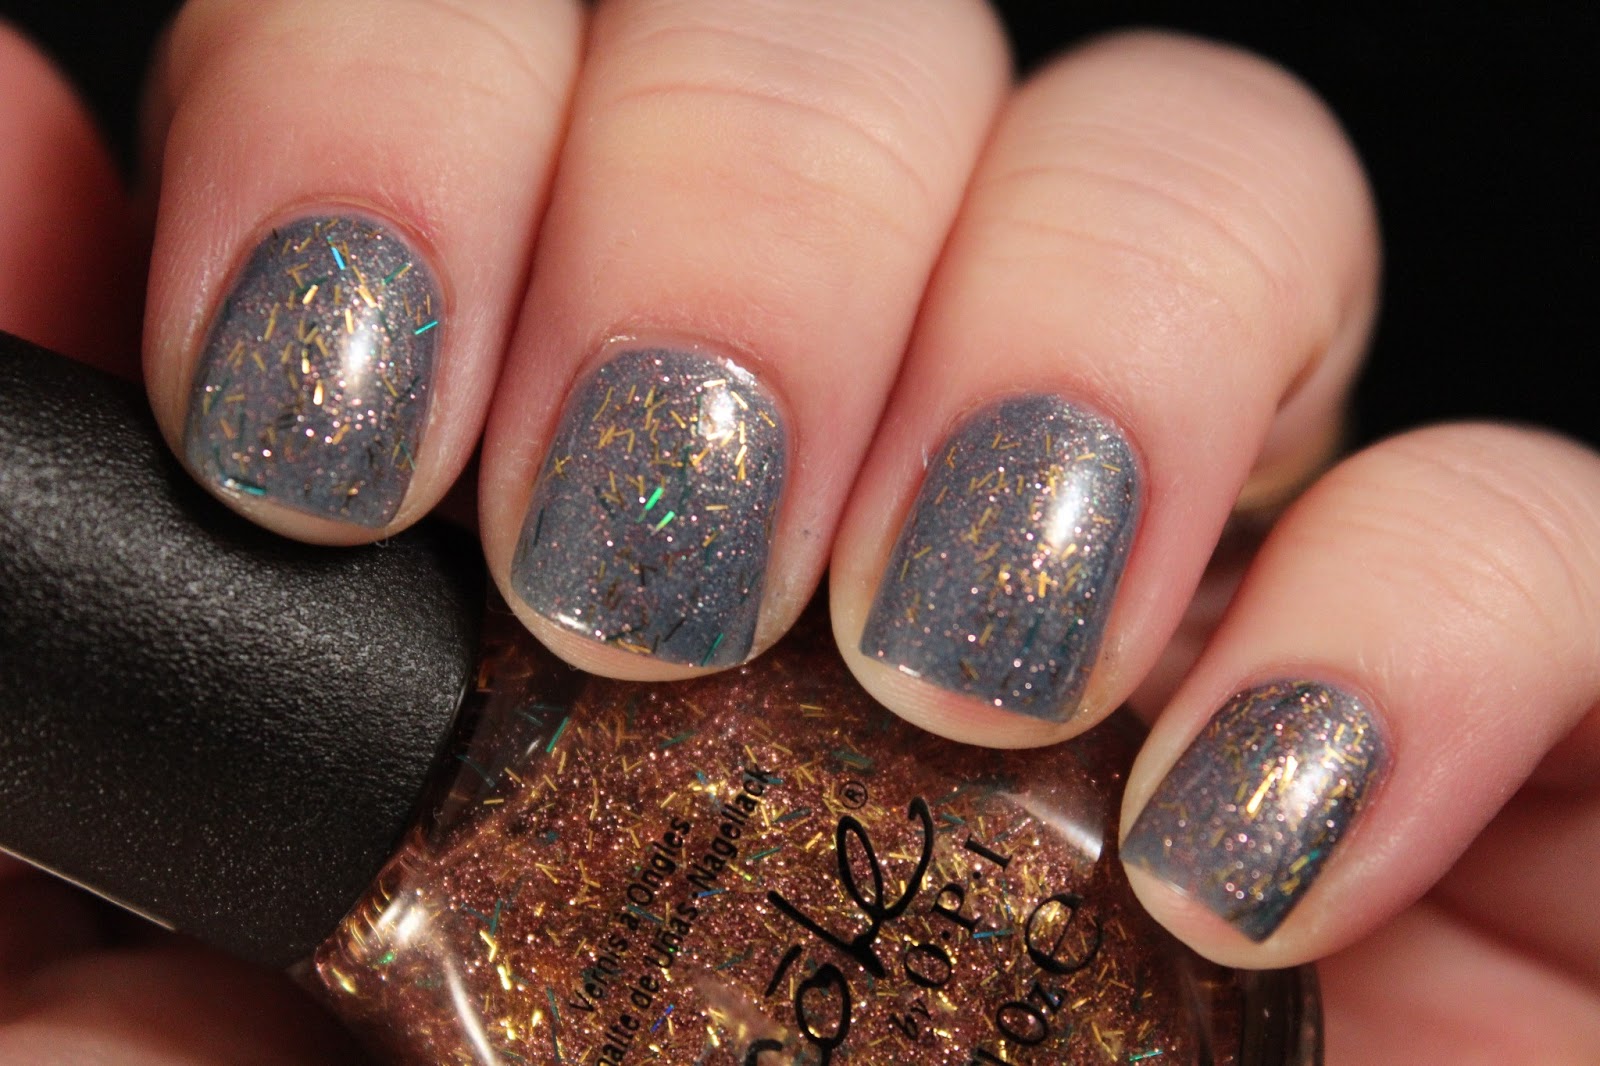
A Gold Winter's Night
Here is a glitter polish from
Nicole by OPI called
A Gold Winter's Night. I have a few glitters from this winter offering and I think their hairy appearance is actually kind of off-putting- so on a whole not really my favorite. I do think, however, that they had a good thing going with the combination of teal, gold and rose/pink components. This is two coats over some medium gray polish that it's been too long to recall the name of. I would grade this polish a
B.
Quick Teal
Now for my
A+ color of the week...I mean if this color doesn't scream amazeballs to you- not just to wear on it's own as I have shown you here, but think of the nail art possibilities. This is
one coat. Let me say that again- ONE COAT. I have a bunch of these high speed fast dry from
Milani because they pack so much punch in one swoop of your brush. I'm not great with my stamping yet, but one coaters are also great for achieving results with you stamping plates. If you're looking to experience with some stamping I'd recommend these polishes, but just in general I am a huge Milani fan! And
Quick Teal is out of this world gorgeous.
These brands can be found at:
China Glaze: Sally Beauty Supply, Ulta
Cult Nails: cultnails.com
Milani: Kmart, any local drug store
Nicole by OPI: Kmart, Walmart, Target, Ulta, any local drug store
Nina Ultra Pro: Sally Beauty Supply
Pure Ice: Walmart
Revlon: Kmart, Walmart, Target, and local drug store
Sation: transdesign.com
Wet n Wild Megalast: Kmart, Walmart, Target, any local drug store
There you have it. 10 fabulous shades I've reviewed, and now you can make up your own mind about them ;) Have a great week all! See you tomorrow for Monday Mani.
Over and Out